If you've ever owned a car from the 1990s, you know exactly what we're talking about.
Whether you own a classic car that was left sitting out in a field for years or a late-model car from the 1990s, there's a really good chance the paint on your roof is chipping or – in the case of my Char Gold Jeep Grand Cherokee – peeling off in sheets. If this is happening to you, then there's good news: you don't have to spend hundreds of dollars (or more) paying a shop to fix your paint. Here's an easy DIY lesson on how to repair your car's peeling paint for anyone getting ready to sell a car or just wanting to help your ride look a little better.

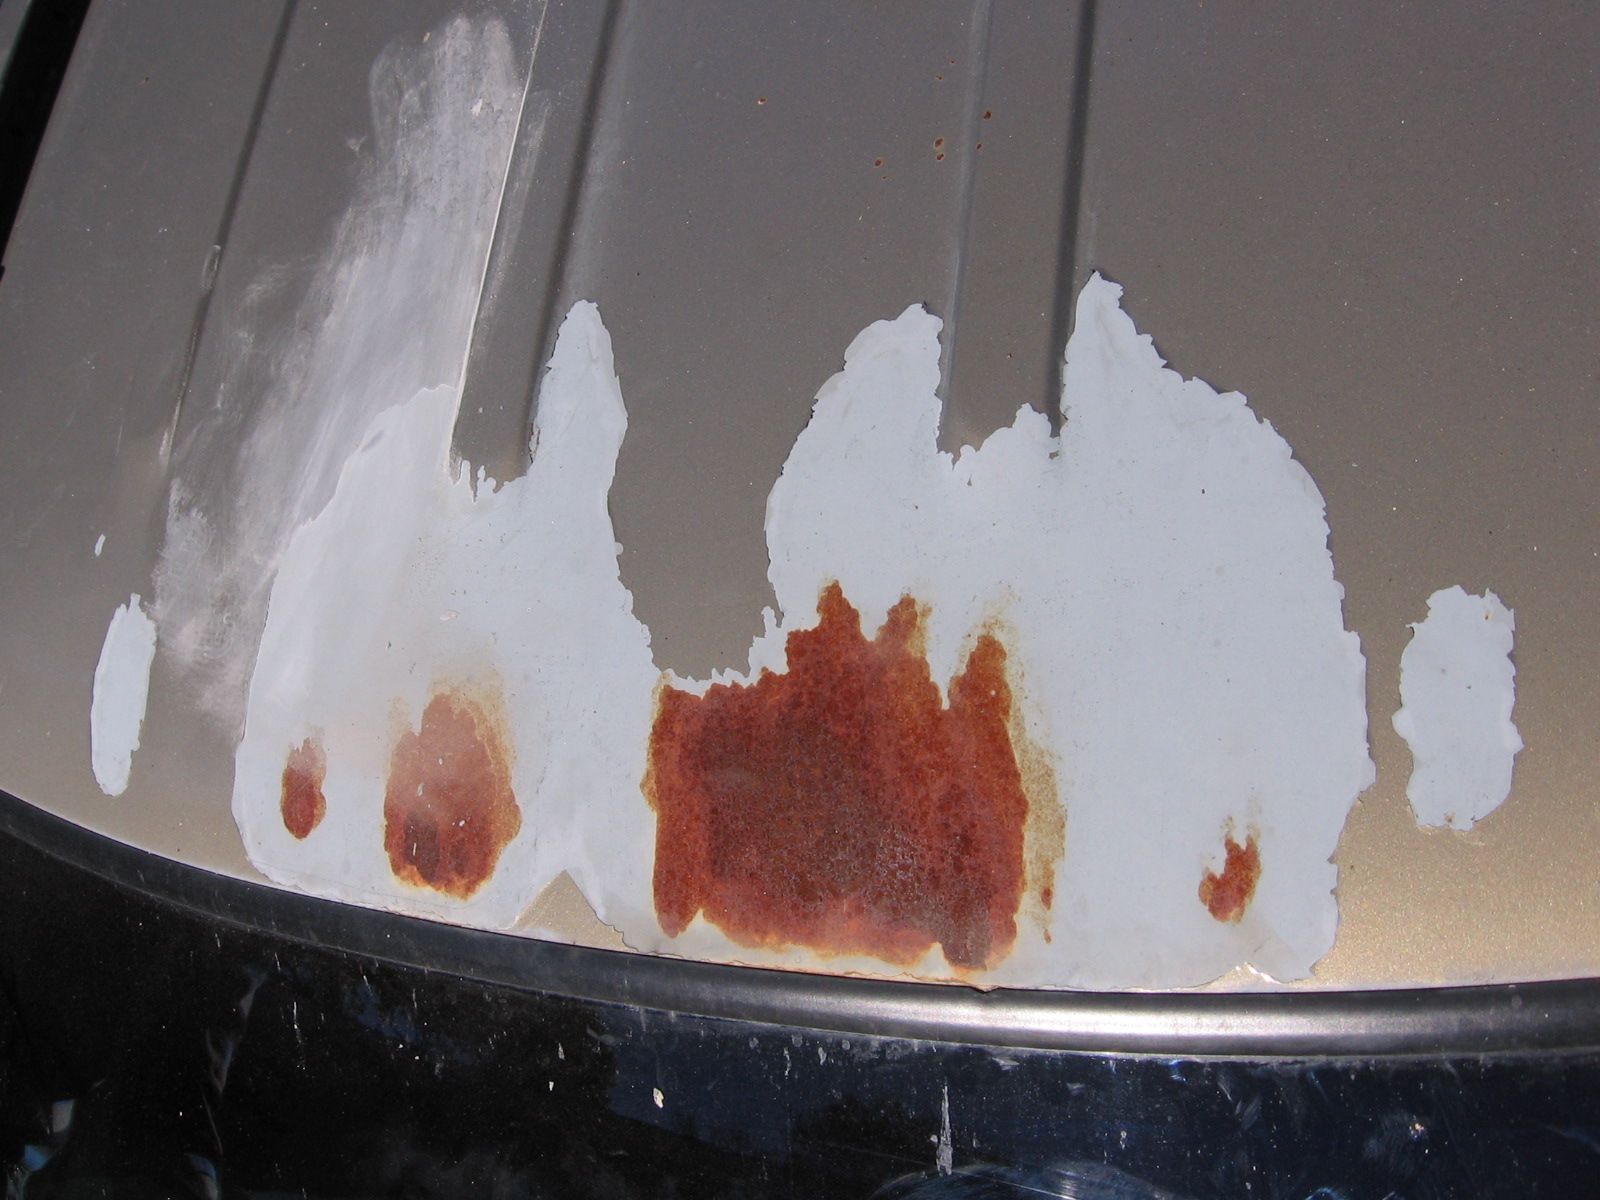
As you can see in this image, not only had my Jeep's paint started peeling off (thanks to a small stone chip), but the primer had also started to fail resulting in rust damage. Fortunately, there are numerous options to fix this damage, but I got supplies from Louisiana-based AutomotiveTouchup. AutomotiveTouchup sells everything from paint pens for small touch-ups to liquid paint for an entire repaint, but this being a small area on the roof, I opted for the aerosol spray can with a factory-matched paint code ($19.95), aerosol grey primer ($9.95), clear coat ($9.95), a sand paper assortment pack ($4.95) and a prep solvent ($2.76).
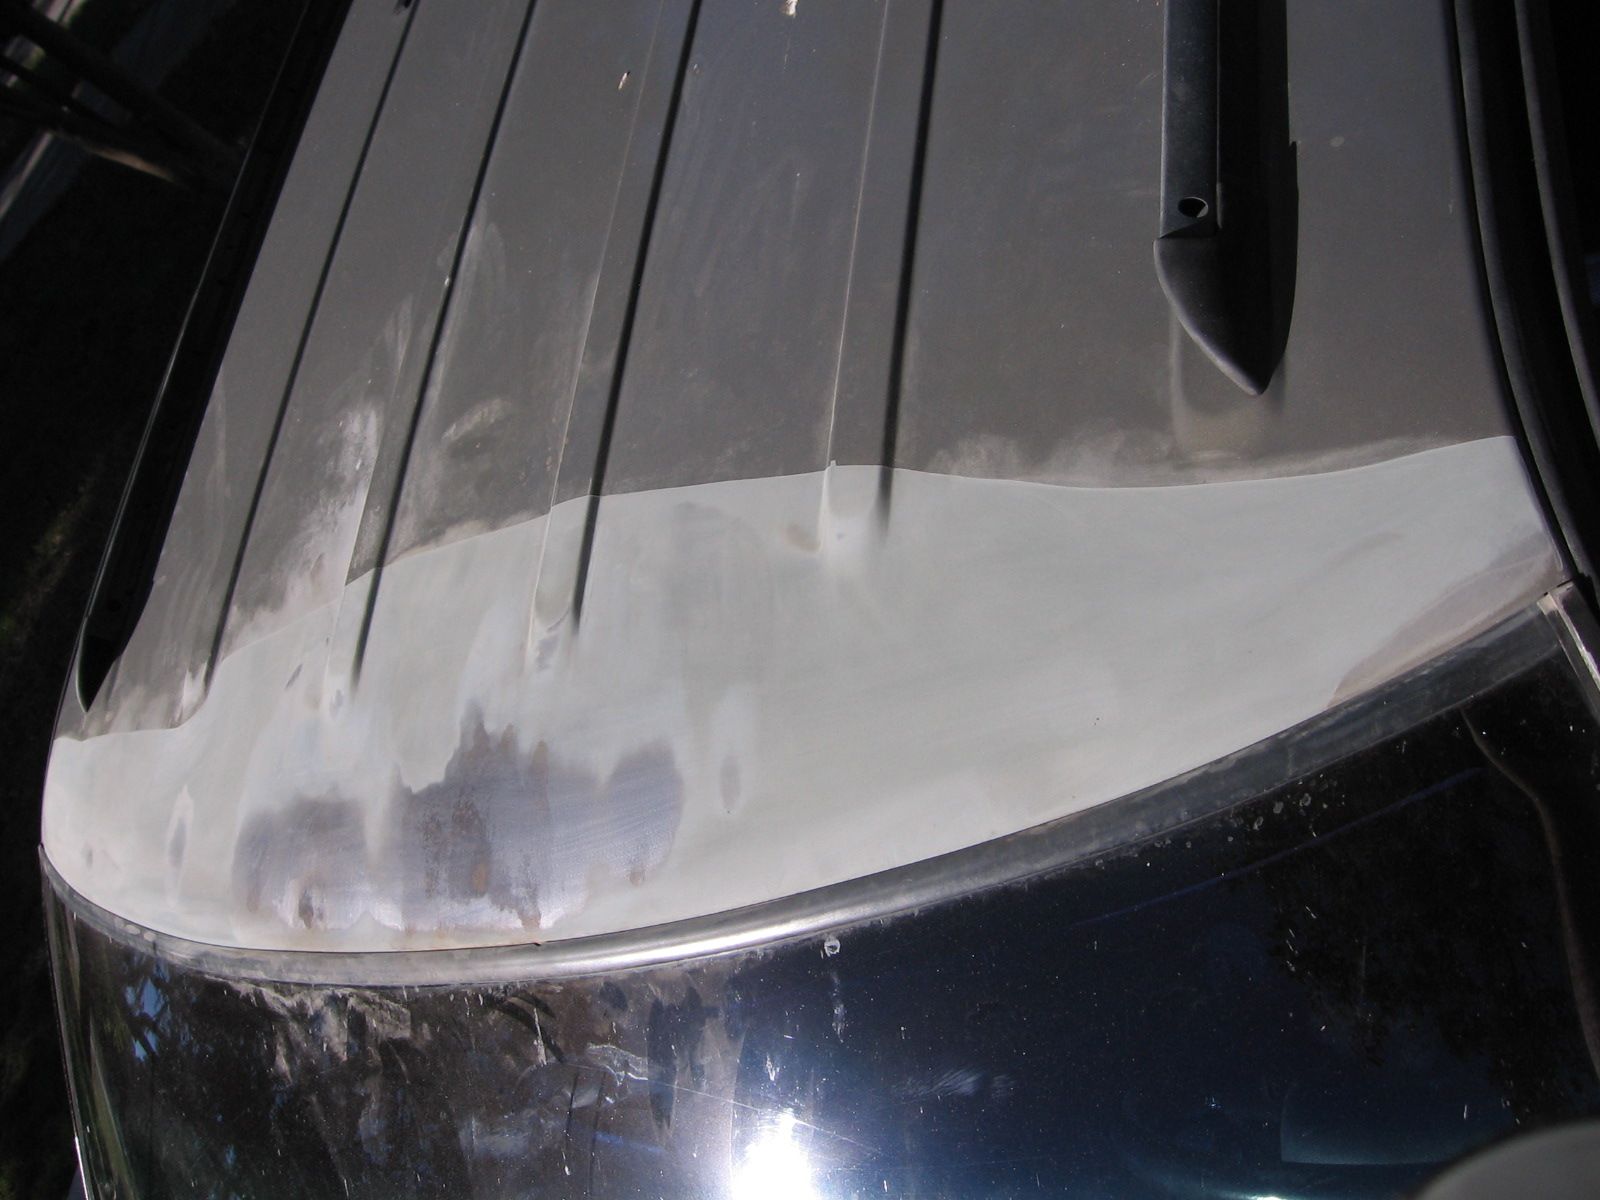
To start the job, I peeled away as much of the loose paint as possible by first using compressed air and then a bath towel (don't tell my wife) to pull off more of the loose paint. After the paint removal, then it was time for sanding, and I used a coarse 180 grit sand paper to remove rust and other paint/primer damage as well as scuff sand painted areas just outside the damaged space. When all was said and done, the area that needed painting more than doubled in size!

I used a damp cloth to get most of the dirt and dust off the area I needed to paint, and then I prepped for paint and primer using the surface prep solvent. I then taped off areas I didn't want oversprayed including the glass, weather stripping and roof rack rails, and I also let plenty of unmasked painted area to blend the paint. Once everything is clean and ready, I laid down a coat of primer making sure to add a little extra where I had sanded down to bare metal to ensure there wouldn't be any waves in the paint. Once the primer had dried, I went over this area with a 600 grit sand paper to prepare for basecoat. And then came the fun part.
With the roof primed and sanded, I then applied four coats of paint waiting about 10 minutes between each coat. After the paint dried, I upgraded to a 1000 grit sand paper to help remove any paint imperfections such as orange peel and runs, and then I finished it all off with the clear coat. If you want a more professional look, you can take an extra step by wet sanding with a 1500 grit sand paper – a step I skipped since this was on the roof of a non-show vehicle.

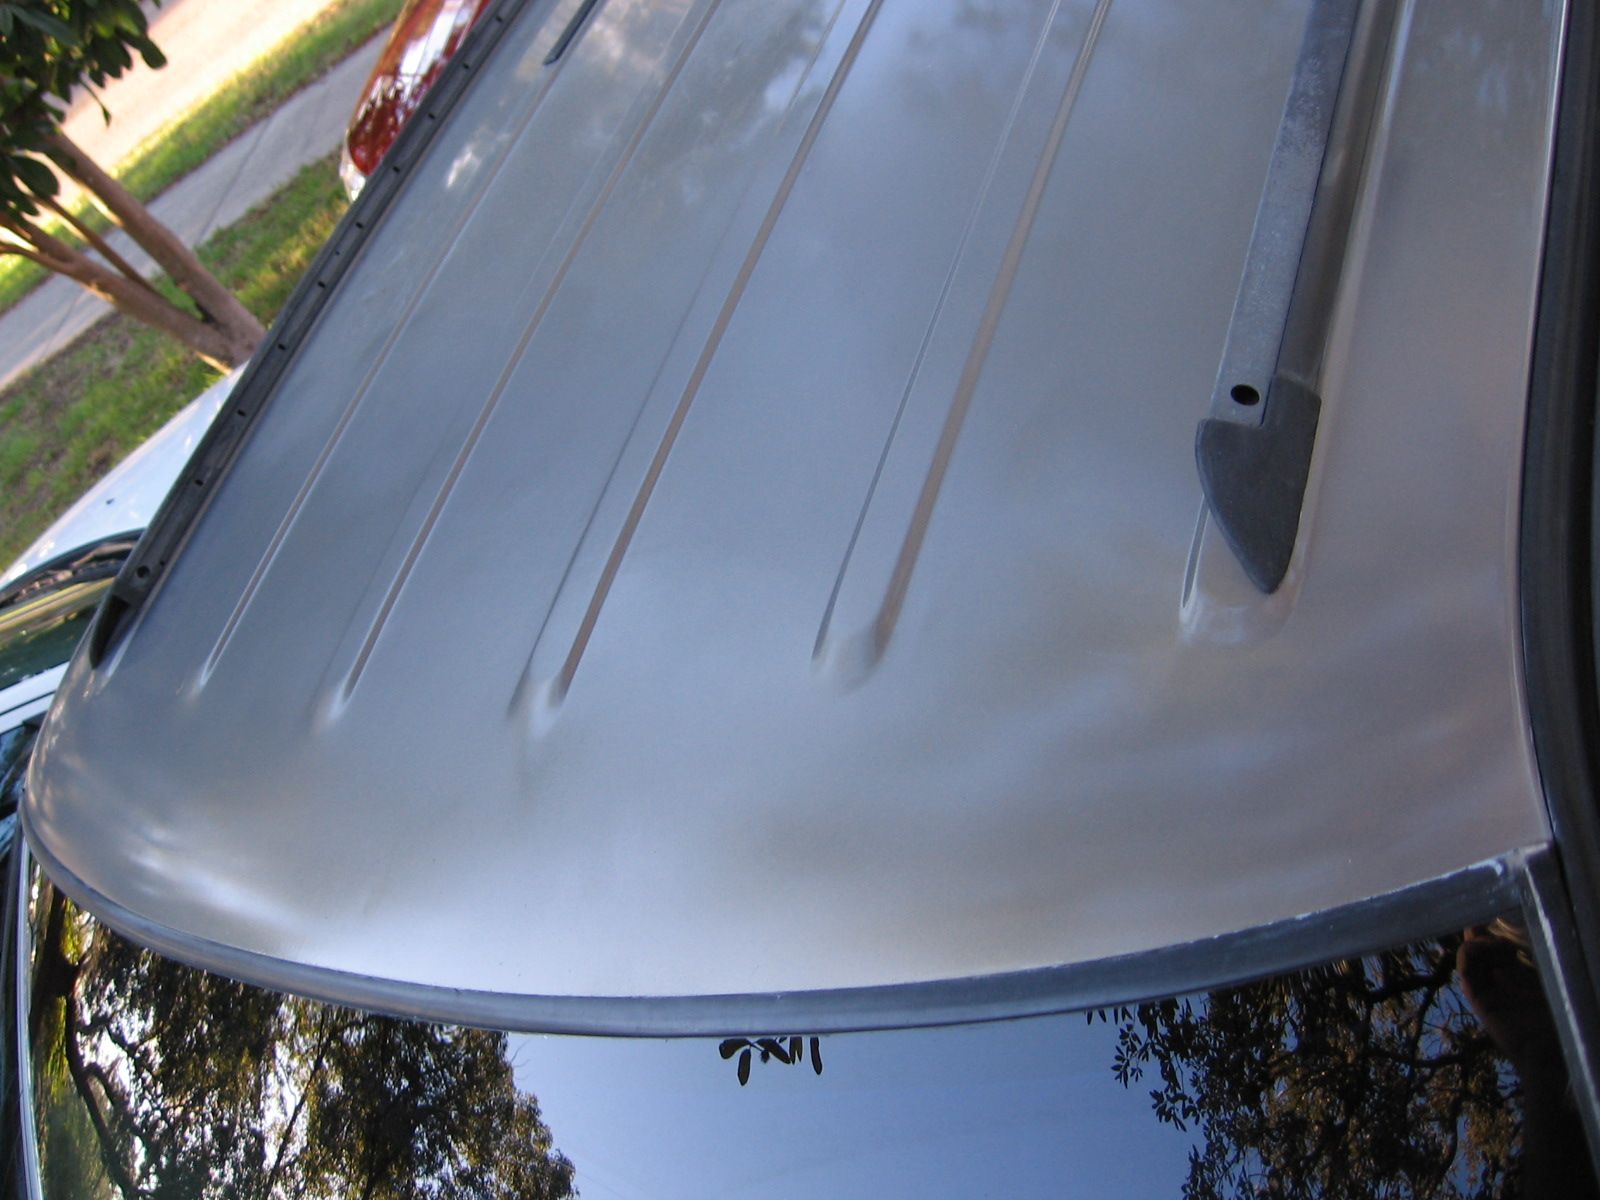
Now, I've had the chance to paint cars in a professional booth in the past, but I am far from a professional paint and body guy. Yet, when the job was done, I was impressed at how well this aerosol can laid paint. I performed this paint repair on a warm and sunny day in my driveway, and I couldn't have been happier with the results I achieved for around $50 (not including shipping or any of the tape and other masking materials that I already had) for a repair that could have easily surpassed $500 at a collision shop. Even though there wasn't any wind on the day I painted, I still used pieces of cardboard to make it easier to paint and limit overspray hitting nearby cars. As you can see in the image above, the result turned out great with the new paint perfectly blended into the old paint to avoid any obvious lines or shade differences. The AutomotiveTouchup paint code perfectly matched my Jeep's factory Char Gold paint color, and with the exception of some primer overspray on the weatherstripping, you couldn't even tell this section had been repainted.


